Hello everybody, welcome to our recipe page, If you're looking for recipes idea to cook today, look no further! We provide you only the best Basic Sourdough Bread recipe here. We also have wide variety of recipes to try.
Before you jump to Basic Sourdough Bread recipe, you may want to read this short interesting healthy tips about Snacks that offer You Power.
Enjoying healthy foods makes all the difference in the way you feel. If we eat more healthy foods and a smaller amount of the unhealthy ones we typically feel much better. Eating more fresh vegetables helps you feel much better than eating a piece of pizza. This can be a problem, nonetheless, with regards to eating between meals. You can spend hours at the supermarket searching for the right snack foods to allow you to feel healthy. There’s nothing like one of these brilliant healthy foods when you need an energy-boosting treat.
Just about the most popular snack foods is yogurt. Often people elect to eat yogurt over a nutritious lunch which is not the greatest idea. Low fat yogurt helps make a fantastic snack, however. It is a protein-rich supply of nutritious nutritional vitamins. Yogurt is frequently eaten to help preserve the digestive system since it is so easily digestible by the majority of people. Try putting in some healthy nuts to unsweetened yogurt for a healthy snack idea. This reduces your sugar intake without minimizing the taste of your snack.
A large variety of instant health snacks is easily accessible. When you make the determination to be healthy, it’s easy to find exactly what you need to be successful at it.
We hope you got benefit from reading it, now let’s go back to basic sourdough bread recipe. To make basic sourdough bread you need 4 ingredients and 10 steps. Here is how you cook it.
The ingredients needed to prepare Basic Sourdough Bread:
- Provide 500 g bread flour
- Take 5 g salt
- Provide 50 g active starter
- You need 350 g warm water
Instructions to make Basic Sourdough Bread:
- Taking 30g starter from the fridge, let it in room temperature. Add 30g warm water + 30g bread flour. Stir it well and let it rise double in size. When you see alot of bubbles, it’s done. It took me 3 hours in the summer. This is active starter. (50g).
- In a mixing bowl, mix warm water with active starter. Add flour and salt. Mix it all together loosely, so that it’s pretty ragged but all the flour and water is mixed. Cover and autolyse 1h.
- Stretch and fold the dough and bring it into a smooth ball of dough. Literally pick up a handful of dough from one side of the bowl, lift it, stretch and fold it over the rest of the dough to the other side of the bowl; you don’t need to pull it tight. Then turn the bowl and repeat the process, do it about 15-20times maximum, until its a smooth ball. Cover the bowl again and leave it out on the kitchen counter; perform the lifting and folding actions 2 to 4 times after resting 30 minutes.
- Recover the bowl, and leave it on the counter overnight if in the winter. It took me 6hr in the summer to see it 2.5 bigger in size.
- Get your banneton out and liberally flour it with rice flour. It needs to be really well floured, all the way up the sides, so that the dough doesn’t stick. Turn down the dough on to the light floured surface and divide in 2 small loaves. Round 2 balls of dough and rest 10’. Covered. Tighten and shape the dough. Place them in banenton.
- Cover it again with a plastic bag/shower cap, and put it in the fridge for minimum 1 hour, maximum up to 3 hours. I put it in the kitchen counter (double in size after 45 minutes)
- After this time, preheat the oven to 250oC. No need to heat Dutch oven. Once the oven is up to temperature, line the Dutch oven with a sheet of parchment baking paper. - Place the tin over the top of the banneton, then invert it/turn it all over together to turn the dough into the pot. Slash the top of the dough with a a clean razor blade, put the lid on and bake it for 40’. Remove the lid for the last 15 minutes.
- When done, remove the whole pans from the oven, carefully take the loaves from the pan. Leave the loaves on a rack to cool.
- Wait AT LEAST an hour before you slice into it. If you cut into the loaf too soon, steam will fill all of those carefully crafted holes and make the bread gummy.
- Enjoy!
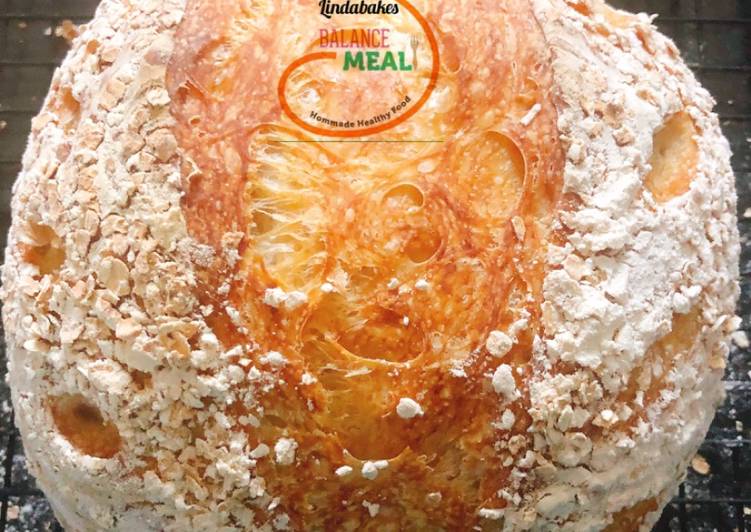
The dough will be quite sticky. A traditionally French shaped sourdough boule. For me that's this basic sourdough bread recipe with starter, the one I make every week, that's completely achievable for beginners too. If you've been dreaming of fluffy, bouncy, true sourdough bread, you can make that happen in your own kitchen! Sourdough is all about learning by doing, and every time you get your hands in the dough, each step will make more sense.
If you find this Basic Sourdough Bread recipe valuable please share it to your friends or family, thank you and good luck.